
Trace Walkthrough, Trace is a free point-and-click escape room game playable on Cool Math Games in your browser, with a fuller version available on Steam. You start trapped in a locked bathroom inside a mysterious house and work your way through several rooms — bathroom, study/living room, porch, and a tower — solving layered puzzles to escape. Most players take between one and three hours to complete it. Every item you collect has a purpose. Nothing is placed in the game by accident.
Before diving in, know this: Trace does not give hover hints. You cannot wave your mouse over objects to find interactive spots. You have to click directly into areas to zoom in — sometimes more than once — before anything useful appears. This is the adjustment that trips up most new players. Slow down and click everything.
Quick Game Reference
| Detail | Info |
|---|---|
| Game Name | Trace |
| Developer | Robert Alvarez |
| Free Version | Cool Math Games (browser) |
| Paid Version | Steam and itch.io |
| Genre | Point-and-click escape room |
| Controls | Mouse or touchscreen — click to zoom, click to interact |
| Key Features | In-game camera (take pictures of clues), notes section, magnifying glass for inventory items |
| Estimated Completion Time | 1 to 3 hours depending on puzzle experience |
| Save Feature | Yes — progress saves automatically |
| Rooms | Bathroom → Study/Living Room → Porch → Tower |
Before You Start: Three Tips That Save Hours
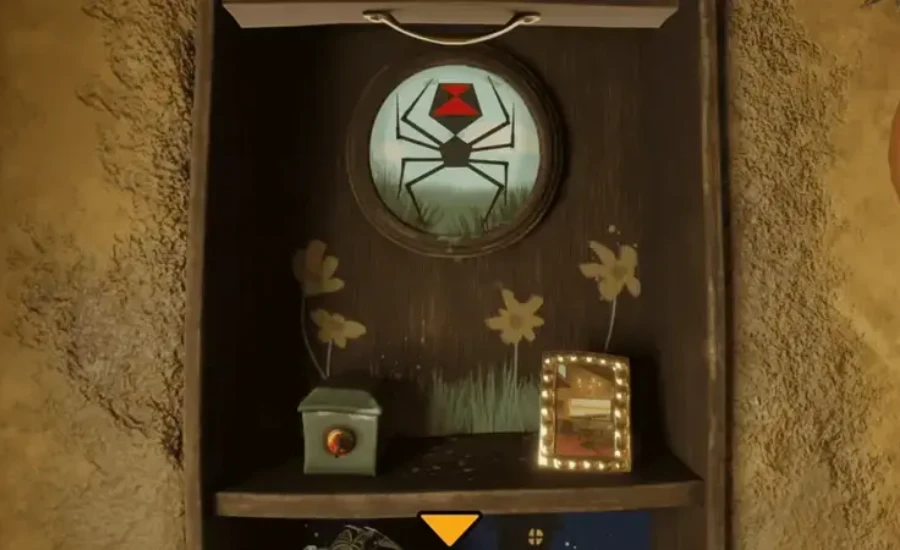
Use the in-game camera constantly. Every time you see a pattern, a diagram, a sequence of symbols, or a code, photograph it. The camera icon sits on the left side of the screen. Your photos are stored in your notes. You will need to reference earlier clues to solve later puzzles. This is not optional.
Click everything twice. Many objects require two clicks to fully zoom in before you can interact with them. If something looks like it should do something but doesn’t, click on it again from closer range.
Think in connections, not rooms. Trace is designed so that items and clues from one room solve puzzles in a completely different room. An object that seems useless in the bathroom becomes essential in the tower. Keep everything you pick up.
Room One: The Bathroom
This is where nearly every player begins. The door is locked and you need to solve a sequence of puzzles to get out.
Collecting the scissors. Look at the sink. One half of a pair of scissors is sitting inside it — click to collect it. The second half is inside a cabinet that will open once you solve the pentagram puzzle. Do not try to force it before then.
The pentagram arrow puzzle. Look near the base of the toilet area and you will find a pentagon shape surrounded by colored arrows. This becomes the signature puzzle type of the game — you will see it multiple times. For the first solve, you need to arrange the arrows so that they trace a five-pointed star (pentagram) shape. A string pentagram hanging nearby shows you the pattern. Once you solve it correctly and press the center button, a cabinet will open. Collect what is inside.
The combination safe behind the mirror picture. Click the picture hanging behind the bathroom mirror to find a combination lock requiring four digits. The numbers are found through a series of small sub-puzzles around the bathroom. Work through each one: the toilet paper roll reveals the number 5, the gold box above the toilet opens by matching the lit buttons (1, 3, 4) to the light pattern above the mirror to give you 8, the star electricity puzzle on the wooden casing around the toilet gives a third number, and a small cabinet on the right side gives more numbers. Divide these correctly (the numbers shown are fractions — divide each by its partner) to get the combination 5-4-7-2. Enter this into the safe and collect the lightbulb inside.
The pumpkin and the final pentagram. There is a pumpkin in a cabinet to the left of the toilet. Insert the lightbulb into the pumpkin. It will light up and reveal a pattern using its eyes and nose — photograph this. Go back to the pentagram and arrange the arrows to match the pumpkin face pattern. This unlocks the cabinet under the sink, where the red key tile is sitting on a roll of toilet paper. Collect it.
Escaping the bathroom. Insert the red key tile into the slot on the bathroom door. This triggers a sliding block puzzle. Your goal is to move the blocks around until the key tile can slide over the green lock in the lower section. Move the purple blocks first to create space, then maneuver the yellow and green blocks to clear a path. This takes patience rather than skill. Once the key tile sits over the lock, the door opens.
Room Two: The Study and Living Room
This is the largest and most complex section. Many players spend the most time here.
First sweep — collect everything you can without solving puzzles yet. Several items do not require puzzle-solving to pick up. Grab the action figure between the potted plant and couch. Grab items from bookshelves. Look under the couch and behind furniture. Collecting these early prevents unnecessary backtracking.
The desk drawers. Open the drawers in the sequence X, O, X, O, U. This gives you a magnet. Hold onto it.
The box cutter / scalpel. You need this tool to cut into the carpet and the sofa arm. Find it in a drawer. Use it on the section of carpet under the end table to reveal a hidden compartment with a puzzle piece and a yellow submarine toy. Use it on the sofa arm near the potted plant to find the brass key.
The giraffe. Find the giraffe toy in the top drawer of the desk with two X symbols on each side. You need to bend the giraffe’s neck to align its diamond-shaped eye with the diamond on a nearby puzzle. This releases the second half of a grey cipher item. Combine it with the first half you got from the planet-sliding puzzle under the pyramid structure to create a complete cipher.
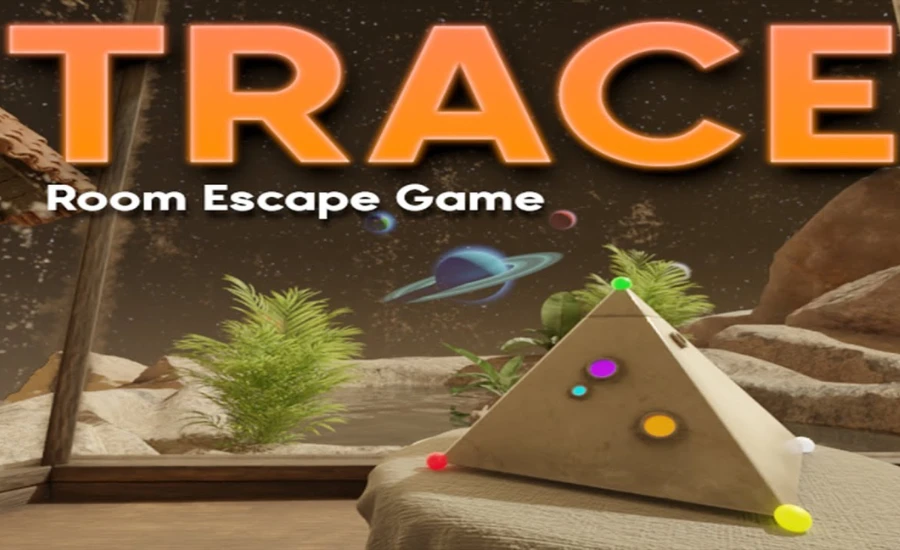
The pyramid puzzle. In the bay window area you will find an off-white pyramid structure. Click its triangular points to change their colors. Match the colors to a diagram you will find later (from a screenshot taken after entering the flight plan into the tower machine). The top of the pyramid will pop up and give you the pyramid key.
The metal tablet and wooden sign. Find the grey metal tablet (the combined cipher from the giraffe). Note the markings on it. Go to the wooden item with a wooden person figure on it near the painting of a white tower. Replicate the symbols from the metal tablet onto this wooden item.
The cipher frame and symbol sequence. Find the photo frame with multiple symbols separated by the “>” icon. Photograph this. It tells you the order in which to press the red buttons around the room. Press the red buttons in this specific sequence: the fish tank button, the table fan button, the computer button, the red button near where you solved the planet puzzle, and finally the red button on the head of the wooden sign puzzle. A green key will appear along with a scalpel. Use the green key on the green door to access the porch.
The barred door and the star panel. On a barred door you will find a panel requiring metal stars placed so that no two are adjacent and no row, column, or color repeats — like a Sudoku constraint. You need five metal stars total. Collect them from various locations around the room. The final one requires using the magnet (from the desk drawer sequence) to pull it from the glass tube under the left side of the table with the heart puzzle. Once all five stars are placed correctly, the front door unlocks.
The computer. Log in using the numbers you found under the desk (sequence 9, 2, 3). The computer controls a submarine in the fish tank. Navigate the submarine into the castle inside the tank to find the code 26336 6161 written on the inner wall — note this for the door panel puzzle. Use the computer’s robot option later (after getting the robotic arm) to climb and look right from the bridge — you will see the symbol sequence: circle, square, triangle, star, square, triangle, circle. Photograph this.
The house door exit panel. This uses the combination obtained from the giraffe/cipher puzzle. Enter it to access a panel with colored squares. Place a star in each colored area and press the red button. This unlocks the front door.
Room Three: The Porch
The porch. Once outside, look at everything. There is an action figure on a shelf near the door — collect it. Find the umbrella on the porch. Use the golden key (found in the wooden frame puzzle inside the tower — you will come back here) to unlock the umbrella. Open it to reveal an image on the porch chair. Photograph this image.
The kite string and robot. Hang the robot (collected from the tower) on the kite string outside. You will need this positioned before returning to the computer inside.
The piano. Look out the window at the bottom of the tower stairs. You will see the words “CABBAGE FACED” written there. Return to the tiny piano on the porch table and play the notes corresponding to the letters C-A-B-B-A-G-E-F-A-C-E-D in musical note order. This opens the piano and reveals the robotic arm inside. Add the robotic arm to the submarine, then place it back in the fish tank and return to the computer.
Room Four: The Tower
The tower contains the game’s most complex and interconnected puzzles. Take your time here.
Entry and first items. Go inside the tower. Immediately to the left is a small table with a vase of red flowers. Above the table is a sliding puzzle — set it to down arrow, S, jagged line, D, X. This opens a hole in the wall from which you collect the phoenix figure and the umbrella key. Also find the robot hanging on a wire upstairs and collect it.
The dragon figure and golden key. Find the wooden frame on the tower wall. Enter the code from the sequence you photographed inside (related to the porch chair image and “Eyes Close in the Dark” clue). Collect the dragon figurine and the golden key behind it.
The launch date machine. Go upstairs in the tower to the machine lit by a golden lamp. Enter the symbol sequence you saw through the robot’s eyes on the bridge: circle, square, triangle, star, square, triangle, circle. This reveals a flight plan puzzle. The launch date you need is 2793 — found in the companion book to the Adventures of a Wayward Cosmonaut inside the fish tank castle. Also note the color order of the planets in that book: orange, earth-colored, white, orange, blue, white. Enter the date 2793 and select GO. A short animation will play — screenshot it. It shows the planet colors you need for the pyramid puzzle back in the house.
The password and computer access. Back in the main house, use the screwdriver (earned from the plinth puzzle below) to remove the metal panel beneath the shelf with the fan. The six symbols revealed read as the password: the symbols displayed resemble <0-|-<. Use this as the password to access the Tower section on the computer, which opens the Mathemagic program. Complete Mathemagic to decode what each symbol on the safe under the desk represents, then enter the correct combination to open it and collect the companion book.
The pinboard and eight-light puzzle. In the central room of the tower, find the pinboard on the back wall. Trace the same image shown on the porch chair in the photo you took earlier — it looks like a wizard’s hat. This unlocks an eight-light puzzle above the board. Turn all lights off by clicking them in this order, using clock positions as reference: 1, 2, 3, 5, 6, 7, 8, 4. An image of a stone plinth appears.
The plinth and four figurines. Place the four figurines (vampire, phoenix, ogre, dragon) on the X spaces on the plinth at their correct crossover points. The crossover logic: phoenix = fire and wings, vampire = bat wings and fangs, ogre = fire and teeth, dragon goes in the center. Place them correctly to earn a screwdriver.
Final escape. Use the pyramid key (from the bay window pyramid puzzle in the main house) to unlock the bathroom door again. Inside, use the brass key to remove the padlock from the toilet lid. Open the lid — the toilet is not a toilet. It is an escape hatch. Climb through. You are out.
You may also like JoinMyQuiz
Frequently Asked Questions
1. What is Trace?
A free browser-based point-and-click escape room game available on Cool Math Games, developed by Robert Alvarez. It is also available on Steam and itch.io in an expanded version.
2. How do you pick up items in Trace?
Click directly on an object. Items are automatically added to your inventory. Use the magnifying glass icon next to any inventory item for a description hint.
3. What is the pentagram puzzle solution?
Arrange the colored arrows on the pentagon panel to trace a star shape. The pattern for the first solve is shown by the string pentagram hanging nearby. Later iterations use patterns from photographs of in-game objects like the pumpkin face.
4. What is the combination to the bathroom safe?
5-4-7-2. Derived by dividing the fractional numbers found around the bathroom: 5/1 = 5, 0.35/0.05 = 7, 16/8 = 2, and the fourth number from the star electricity puzzle. Enter this to get the lightbulb.
5. How do you escape the bathroom?
Insert the red key tile (found under the sink after the final pentagram solve) into the door slot. Solve the sliding block puzzle by moving purple blocks to clear a path for the key tile to reach the green lock.
6. What order do you open the desk drawers?
X, O, X, O, U. This gives you the magnet.
7. What is the piano password? CABBAGE FACED — seen written outside the tower window. Play these notes on the tiny porch piano to open it and retrieve the robotic arm.
8. How do you solve the star panel on the barred door?
Place five metal stars so that no two are adjacent and no row, column, or color contains more than one star — similar to a Sudoku constraint. The fifth star is retrieved using the magnet from the glass tube under the table.
9. What is the launch date for the tower machine?
2793, found in the companion book inside the fish tank castle via the submarine on the computer.
10. How do you solve the plinth with four figurines?
Match each figurine to its crossover point: phoenix = fire and wings, vampire = wings and fangs, ogre = fire and teeth, dragon = center. The image on the stone plinth shows the layout.
11. How do you finally escape?
Use the pyramid key on the bathroom door, the brass key on the toilet padlock, and open the toilet lid — it is the escape hatch. Climb through to finish.
12. How long does Trace take to complete?
Between one and three hours for most players. The developer notes that even experienced puzzle players will likely need at least one hour. Progress saves automatically so you can return later.